Setup Guide
Overview
The application facilitates seamless integration with JupiterOne and Jira, enhancing the ability to manage and respond to cybersecurity alerts. This integration empowers users to automatically generate Jira tickets from JupiterOne alerts and create alerts within the system, ensuring that critical vulnerabilities are promptly addressed. The application fetches data from JupiterOne, maps fields to Jira issues, and allows for customization of these mappings. With automated alert creation, ticket generation, and updates, the application streamlines workflows and improves the efficiency of incident response processes. The user-friendly setup and real-time synchronization between JupiterOne and Jira ensure that cybersecurity efforts are both comprehensive and up-to-date, ultimately strengthening your organization’s security posture.
Prerequisites
Ensure the JupiterOne account must have the following permissions:
- Full Admin Privileges
- API Key Management (Read and Write)
- Alerts (Read and Write)
Ensure the Jira account must have the following permission:
- Admin Privileges
Configuration in JupiterOne
Generating JupiterOne API Token
- Log in to the JupiterOne portal using your Administrator privileges.
- Go to Settings > API Tokens
- Click on New Token
- Provide the following details
- Token Name Assign a name to the token.
- Days before Expiration Set the token's expiry date.
- Copy the API Token and save it securely as it can only be viewed once.
Get JupiterOne Account ID
- Log in to the JupiterOne portal using your Administrator privileges.
- Go to Settings > Account Management
- Copy the Account ID
Configuration in Jira
Before beginning the configuration, ensure that you have a JIRA project created
-
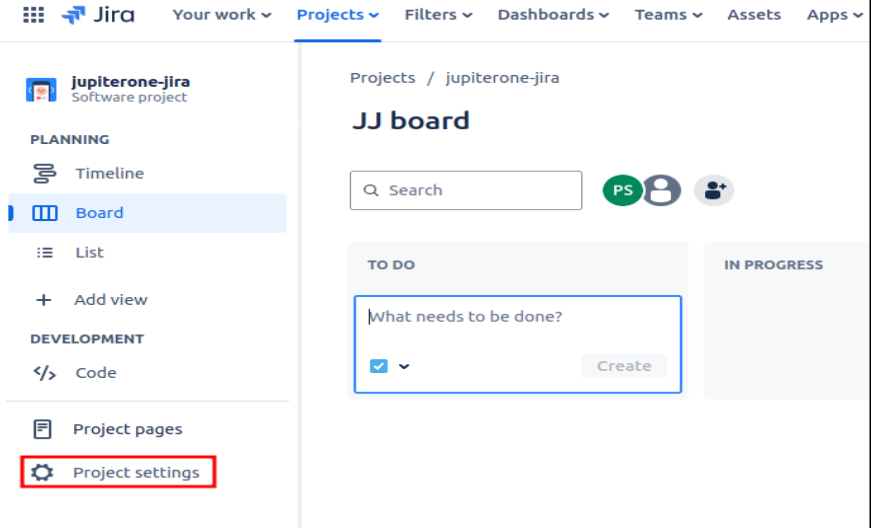
Go to your project and click on the Project Settings. Navigate to Issues, open any issue type, click on Go to Custom fields at bottom right, and click on the Create Custom Field button

-
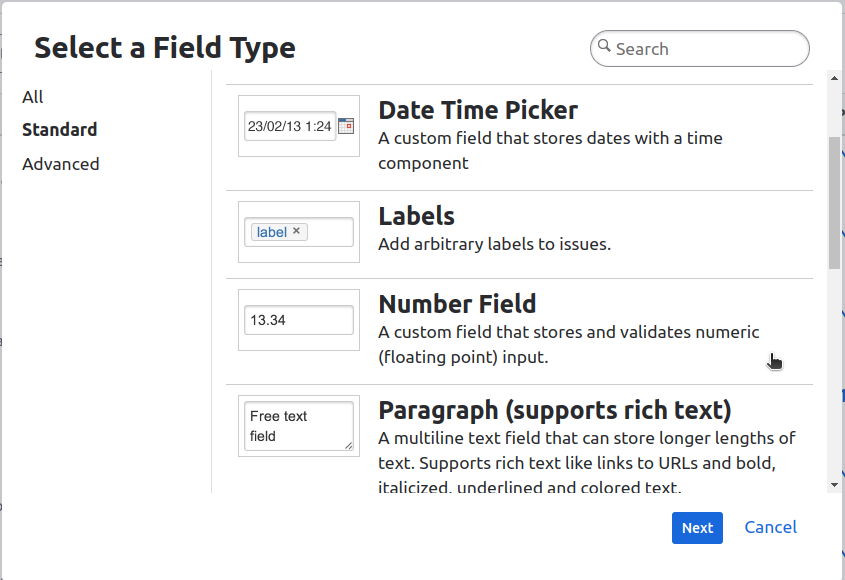
Select required field type
- To map specific field types, create custom fields in Jira as follows:
- Number Field: For mapping number-type fields.
- Labels: For mapping array-type fields.
- Datetime Picker: For mapping datetime-type fields.
- To map specific field types, create custom fields in Jira as follows:
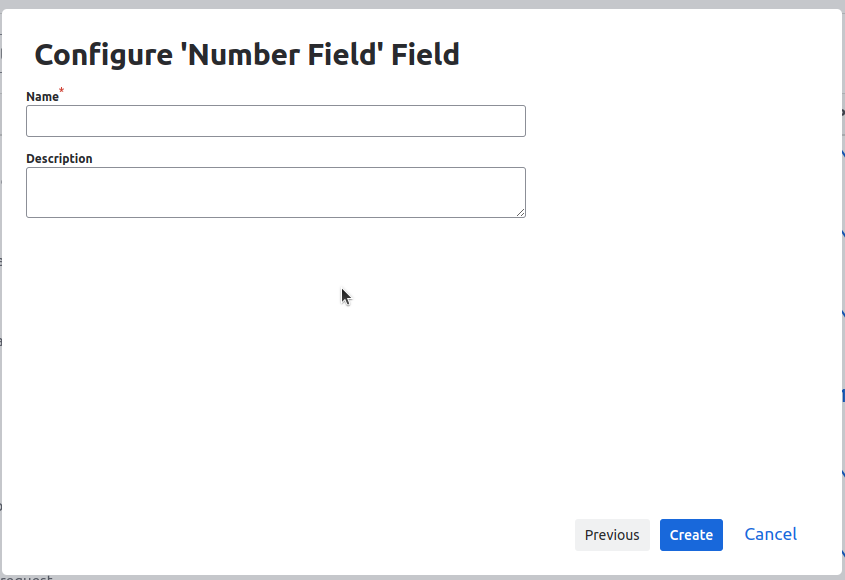
-
Enter the field name, description and click on the Create button.
-
Go to your project and click on the Project Settings
-
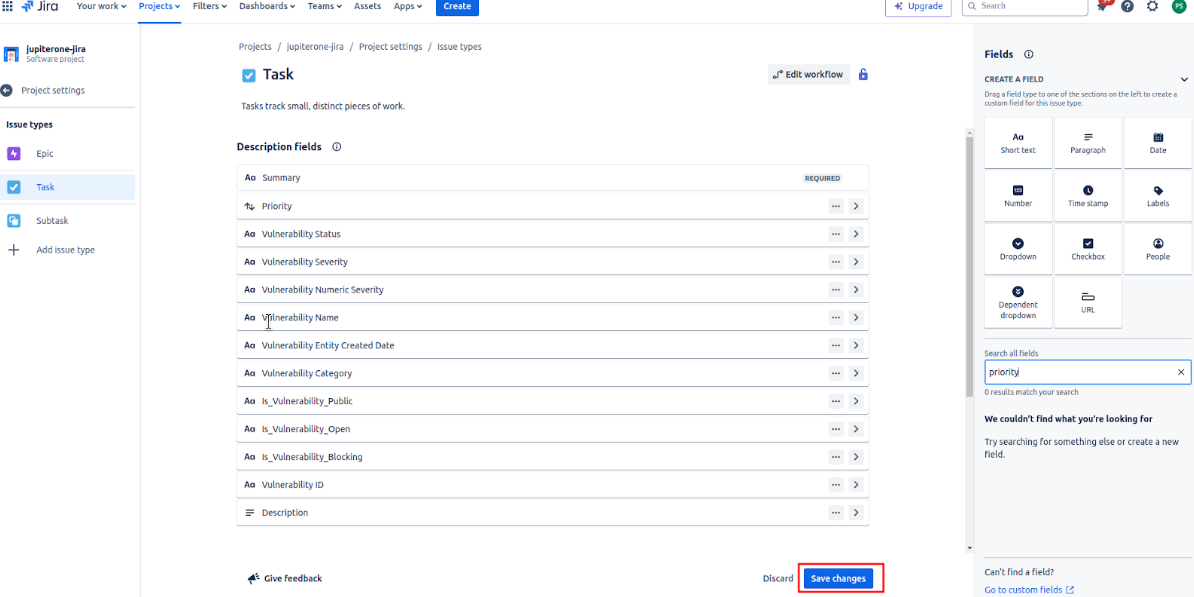
Go to Issue Types, select an issue, and search for the required custom fields
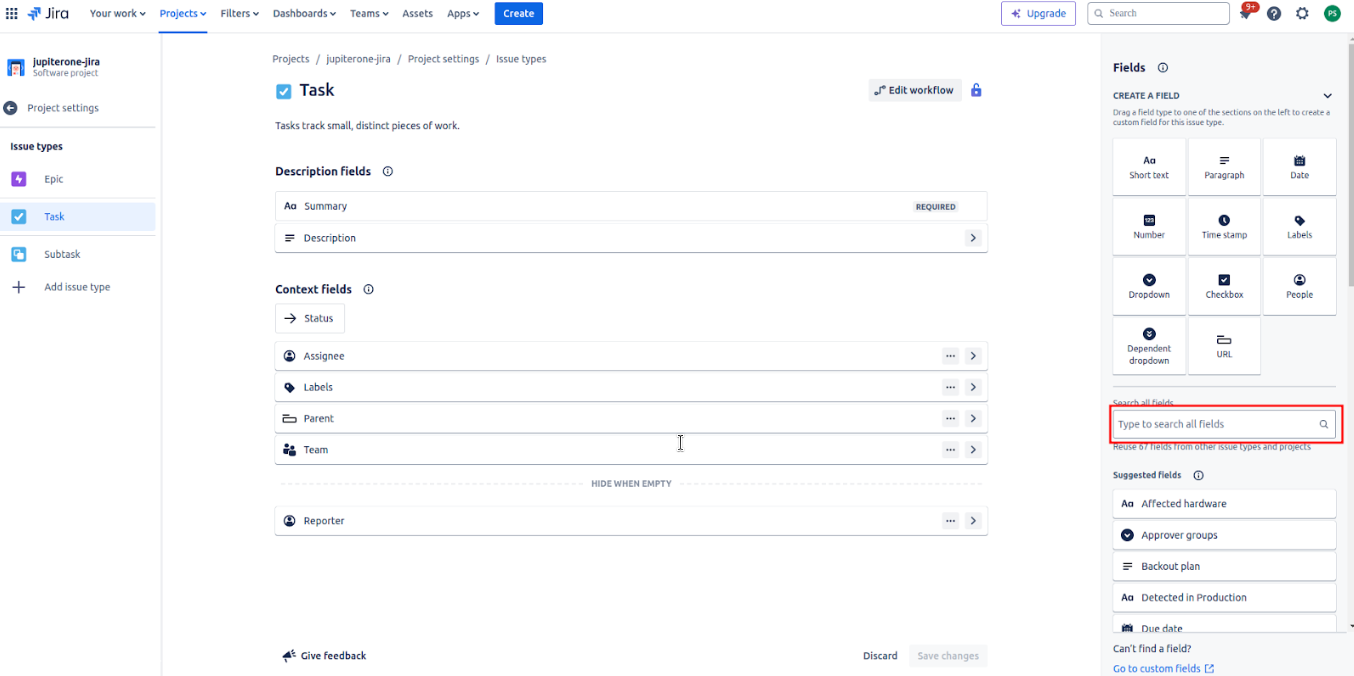
-
The custom fields will be visible under the Description fields tab. Once you have added all the custom fields, click on the Save changes button.
Using the Application
The integration enables you to use the following functionalities within the JIRA dashboard
- You can create JupiterOne alerts.
- You can map JIRA fields with JupiterOne fields to create Issues for vulnerabilities.
Creating Alerts
-
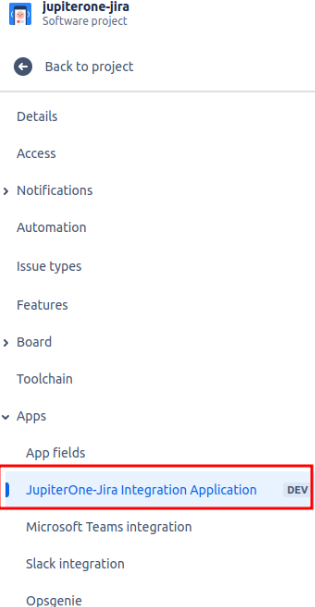
Go to your project > Project Settings > Apps and select the JupiterOne-Jira Integration Application
-
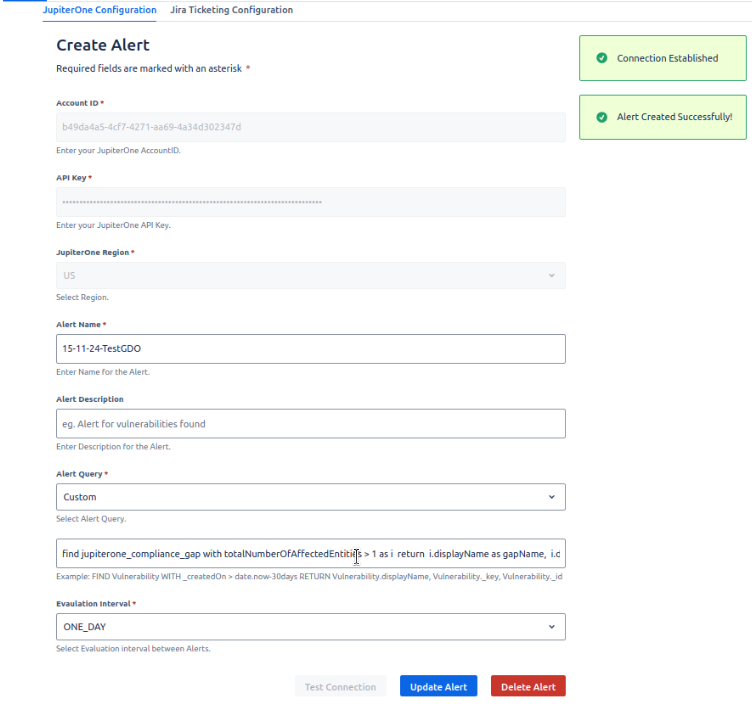
Go to the JupiterOne Configuration tab.
-
The application will prompt you to enter the following details
- JupiterOne account ID
- JupiterOne API Key
- JupiterOne instance region
- Name of the Alert
- Alert query
- Evaluation Interval
-
After entering the details, click on the test connection button. This will authenticate your credentials and create the alert. After successful authentication and alert creation, Status will be shown
Mapping JIRA fields with JupiterOne fields
-
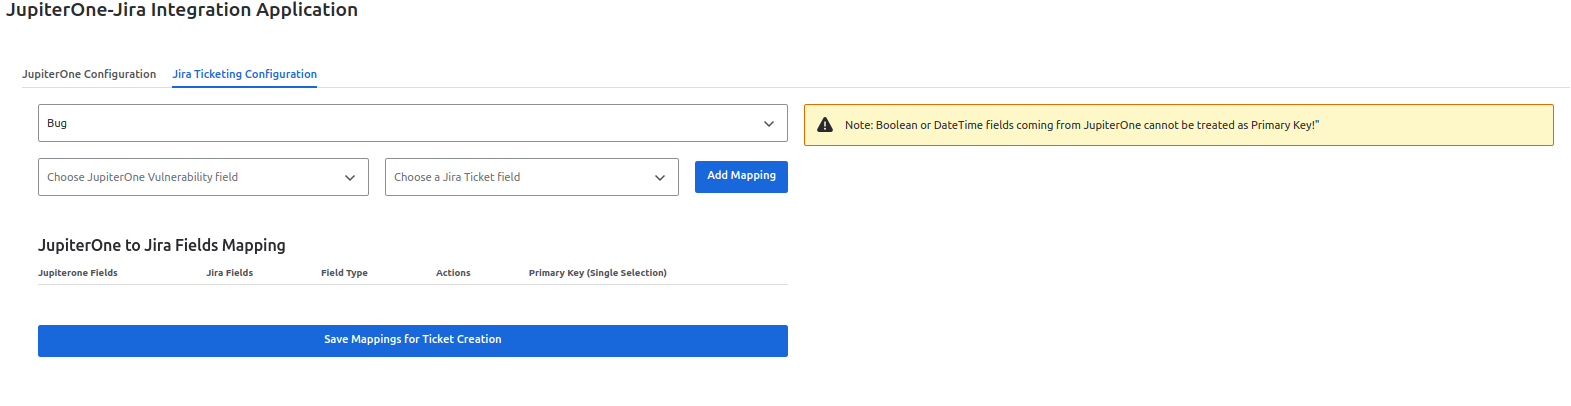
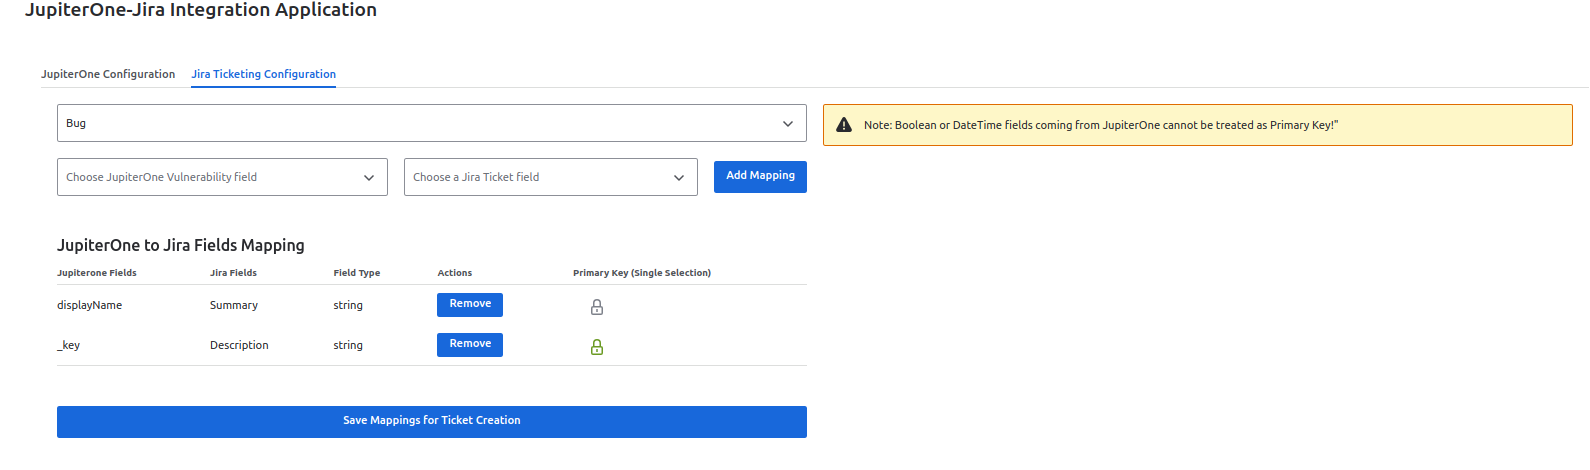
Go to the JIRA ticketing configuration tab
-
Select Issue type
-
Select the JIRA field and JupiterOne field that you want to map and click on the Add Mapping button
- Summary and Description JIRA fields are required to be mapped.
- Boolean or DateTime fields coming from JupiterOne cannot be selected as Primary Key
-
Your mappings will be shown under the JupiterOne to Jira Fields Mapping table. You can remove a mapping by clicking on the Remove button under Actions.
-
Click on the lock icon next to the mapping you want to select as the primary key.
-
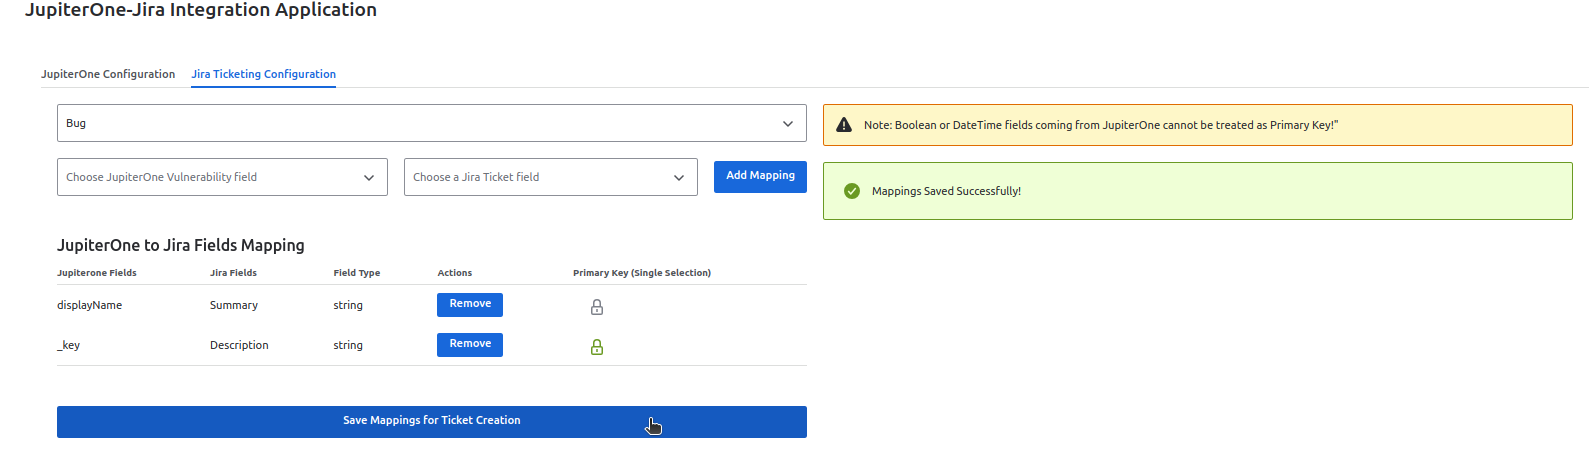
After adding the mappings, click on the Save Mappings button to save the mappings. Upon successful completion, a status box indicating “Mappings saved successfully” will be shown
Updating Alerts
-
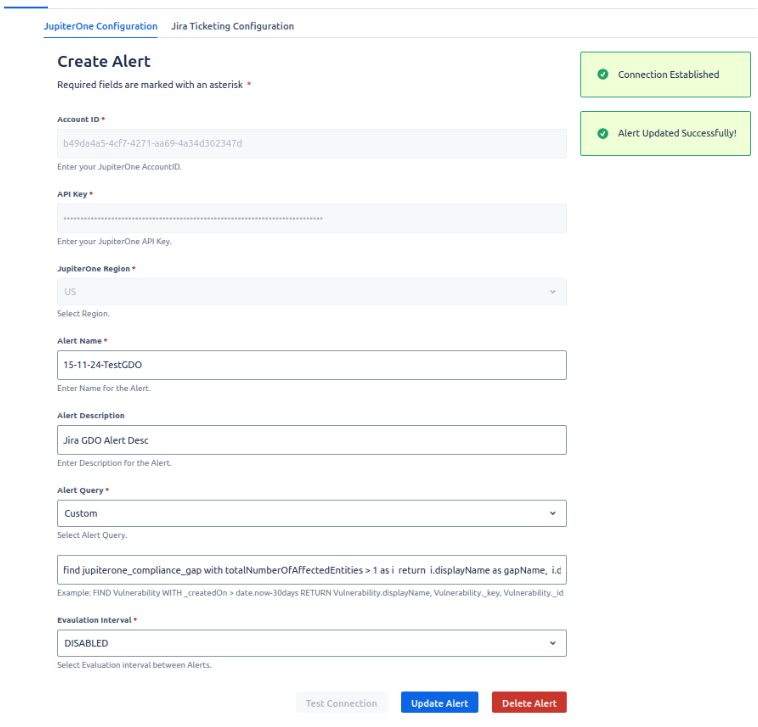
Go to the JupiterOne Configuration tab.
-
The application will prompt you with the configured page where JupiterOne account ID, JupiterOne API Key, the JupiterOne instance region fields and Test connection button will be disabled.
-
Modify Alert Name, alert query, and the evaluation interval of the alert as per requirement.
-
After entering the data, click on the Update Alert button. This will authenticate your credentials and update the alert. After successful authentication and alert creation, Status will be shown
Note:
After Alert Updation, the fields of JupiterOne Fields dropdown will also be updated according to the change in query and mappings can be done accordingly
Deleting Alerts
-
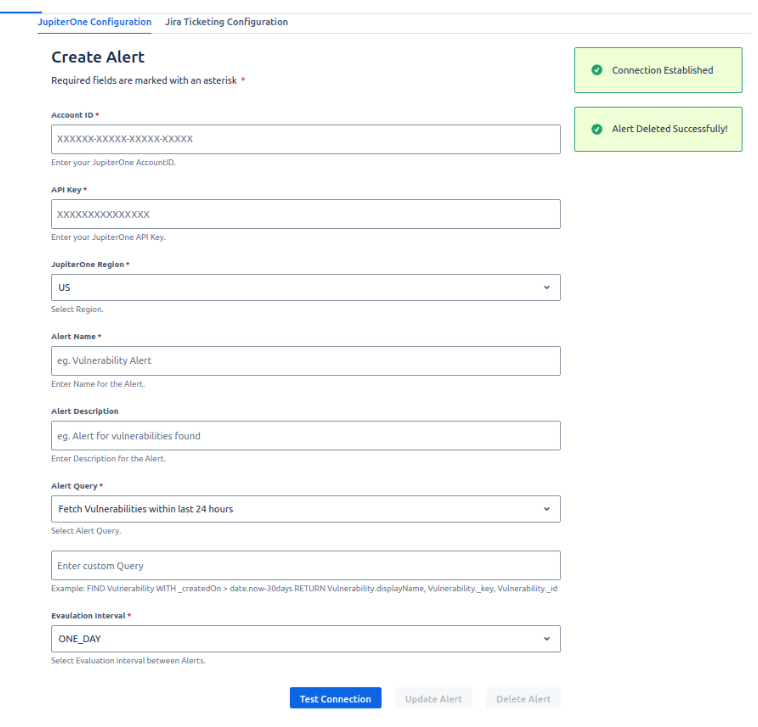
Go to the JupiterOne Configuration tab.
-
The application will prompt you with the configured page where JupiterOne account ID, JupiterOne API Key, the JupiterOne instance region fields and Test connection button will be disabled.
-
Click on the Delete Alert button. This will authenticate your credentials and update the alert. After successful authentication and alert creation, Status will be shown
Limitations
Duplicate issues
In Jira duplication of issues arises when the primary key value of the data is empty or the string acting as primary key has some special characters.
- The supported special characters are @, #, $, %, &, and -
Numeric data
When few math operations are used on return properties of custom query Numeric data may come as undefined.
-
Supported Math Operations for custom query are +, -, *. Math Operations can be used as mentioned in the below example.
FIND jupiterone_compliance_gap with totalNumberOfAffectedEntities > 1 as i return i.displayName, i.description, i.ref, i.totalNumberOfAffectedEntities+5, i.framework
-
For other Math operations alias should be used as mentioned in the below example
FIND jupiterone_compliance_gap with totalNumberOfAffectedEntities > 1 as i return i.displayName, i.description, i.ref, i.totalNumberOfAffectedEntities/5 as gapAffected, i.framework
Troubleshooting
This section aims to guide users about the possible problems they might encounter while using the app. Please follow the instructions if you come across any of the following scenarios
Alert creation failure
- The alert name should be unique.
- Make sure your account has the required permissions to create alerts.
JIRA field names not visible
If the JIRA field names are not appearing in the "Choose a JIRA Ticket Field" dropdown, please refresh the page.
Debugging
If you encounter issues while using the app, you can use your browser's developer console to help diagnose problems. Follow these steps:
- Open the Browser Console:
- Press F12 or Ctrl+Shift+I (Windows/Linux) or Cmd+Option+I (Mac) to open the developer tools.
- Navigate to the "Console" tab to view logs, errors, and warnings.
Conclusion
In conclusion, this document has provided a detailed guide to using the JupiterOne and Jira integration app. By integrating these platforms, users can enhance their workflow efficiency and vulnerability management capabilities. The app facilitates the automatic creation of alerts and seamless synchronization of vulnerability data, ensuring that critical issues are tracked and resolved in Jira. Additionally, users can leverage this integration to gain real-time insights and maintain a comprehensive view of their security posture within the Jira environment.