Alerts
JupiterOne Alerts is a powerful tool that enables you to automatically monitor your workspace through the use of rules. By configuring rules, you are able to execute and leverage J1QL queries that run on a particular interval to run and look for findings on their designated interval. When these rules run a query and find results, you are notified by an alert, which can be configured to be sent through various channels of your choosing.
By using Alerts, you can begin to embed JupiterOne into your existing security workflows. For example, if a security finding requires remediation, you could configure that alert to create a corresponding Jira ticket to then be addressed. Depending on severity, it could also send a Slack or email notification to the appropriate team. By creating custom rules, you can curate the alert behavior to your specific needs.
In addition to custom alerts, JupiterOne offers pre-configured rule packs that provide rules built around various tools and use cases. Read more about rule packs
Creating Alert Rules
To create a single rule for alerts:
-
Navigate to the Alerts and select the Rules tab.
-
Click New rule. This opens the full-page rule editor.
-
Provide the following details for the new custom rule:
- Name: Name for the alert rule.
- Resource group: The resource group the rule belongs to, which governs who can access it.
- Description: Brief description of the rule.
- Severity: The level of severity for the particular alert (Info, Low, Medium, High, Critical)
- Evaluation interval: The interval for which the system re-evaluates the rule (Disabled, 1 week, 1 day, 12 hours, 8 hours, 4 hours, 1 hour, 30 minutes, 15 minutes). Intervals shorter than your plan allows appear disabled.
- Rule tags: Key/value labels used to organize and filter your rules.
- Notify on evaluation failure: Sends a notification when the rule fails to evaluate.
- Query: The J1QL query used to monitor changes to trigger the alert.
Tip: ORDER BY Best Practice: It is discouraged to use the
ORDER BYJ1QL keyword within the query powering an Alert Rule as it may cause unexpected rule evaluation failures and slower performance.
-
In the Action trigger conditions section, choose when the configured actions should run. Three options are available:
- All query results, when results have changed: Actions run with all query results, but only when the results differ from the previous evaluation.
- Newly discovered results, when results have changed: Actions run only for results that were not present in the previous evaluation. This is the option to use for change detection.
- All query results, every evaluation: Actions run with all query results on every evaluation, without comparing to previous results.
-
Select the appropriate Actions for the rule to take when action trigger conditions are met. By default it will send a JupiterOne Alert.
Some configuration options may vary depending on your workspace plan with JupiterOne.
Rules that have failed to successfully run in over 30 days and have not received any updates will automatically be disabled and moved to the "System Disabled" state.
Want to detect when data in your graph has changed? See our guide on Detecting Data Changes with Alert Rules to learn how to create alerts that trigger when entities are updated or modified in your environment.
Additional configuration
JupiterOne offers additional actions and flexibility around building alerts into workflows outside of JupiterOne. You can configure more complex actions such as sending an Alert notification to a designated Slack channel, or creating a Jira ticket based on an alert.
Actions
When creating a rule, you can specify any of the following actions to be made when the alert is triggered:
-
Tag Entities: This action runs on every rule evaluation, even when "Newly discovered results" is selected. You can choose between two operations:
- Set Tag: Tags all entities returned by the query with the specified tag value
- Unset Tag: Removes the specified tag from all entities that were previously tagged by this rule
Note: When multiple rules tag the same property on the same entity, the rule that runs first takes precedence. Any subsequent rules will not overwrite that property, since the oldest value wins.
-
Email: You provide the email addresses to alert and what you want in the email message.
-
Slack: You must first configure the Slack integration for JupiterOne by following these instructions. Ensure that you specify the channel in the format #channel.
- Troubleshooting note: If you are having trouble with Slack messages not sending, ensure that the JupiterOne Slack integration has been set up with the correct permissions. The JupiterOne Slack integration must have the
chat:writeandchat:write.publicpermissions to send messages to Slack. Additionally, you will want to ensure that the Slack integration has been authorized.
- Troubleshooting note: If you are having trouble with Slack messages not sending, ensure that the JupiterOne Slack integration has been set up with the correct permissions. The JupiterOne Slack integration must have the
-
JIRA: You must first configure the JIRA integration for JupiterOne by following these instructions. When you create a rule that triggers the creation of a Jira ticket, you provide the following:
- Summary: title of the Jira ticket
- Description: JupiterOne automatically lists the affected entities and the associated query, but you can edit this field to contain other information.
- Project: ID of the Jira project to which you want to assign the ticket.
- Issue Type: type of issue you want the Jira ticket to be, such as task or bug.
- Entity Class: (mandatory field) the class of the new ticket entity that you want to assign to the ticket, such as vulnerability or policy. Integrations Instance: select the Jira instance from the dropdown menu.
- Additional Fields: you can add any other of the Jira ticket fields if you want to return that information.
- Auto-Resolve: Automatically closes Jira tickets when there are no more results that match the alert rule. For example, whenever the rule goes from zero results to >0 results, JupiterOne will open a new Jira ticket. Whenever the query returns an empty result set, the previously opened ticket will be marked as Resolved via the Jira integration. You must provide a Resolved Status for the Jira ticket to be automatically closed. Note: this will not close any Jira tickets upon alert dismissal. Read more about the JupiterOne alert rule schema
-
ServiceNow: Select the integration instance from the dropdown menu and enter the content for the request body. The message body is sent to the
/api/now/tableincident endpoint. Go to the REST API Explorer page in your ServiceNow deployment to learn about additional fields. The request automatically assigns the number property to bej1:{rule-instance-id}.
This reference link shows the default/common fields on Incident records via the Table API which can be defined within the Request Body contained in the JupiterOne Alert Rule Action: https://www.servicenow.com/docs/bundle/yokohama-api-reference/page/integrate/inbound-rest/concept/c_TableAPI.html#d248908e3139
-
SNS: The AWS account you want to send to must be configured as an AWS Integration, and the J1 IAM role for the AWS account you want to publish to must have the
SNS:Publishpermission. -
SQS: The AWS account you want to send to must be configured as an AWS Integration, and the J1 IAM role for the AWS account you want to publish to must have the
SQS:SendMessagepermission. -
Send to S3: Uploads alert data as a JSON file to an S3 bucket. The AWS account you want to send to must be configured as an AWS Integration, and the J1 IAM role for the AWS account must have the
S3:PutObjectpermission for the target bucket. You can control the contents of the JSON file that gets uploaded. For example:{"description": "{{alertWebLink}}\n\n**Affected Items:**\n\n* {{queries.query0.data|mapProperty('displayName')|join('\n* ')}}"}This allows you to customize what information is included in the uploaded file, using template variables to include alert details, query results, and formatted entity data.
-
Webhook: Sends a message to the specified webhook URL.
-
Tines trigger: Pushes data from a JupiterOne query to a Tines action workflow.
-
Send to Google BigQuery: Streams alert data to a Google BigQuery table.
-
For each: Runs a set of nested actions once per entity returned by the query results.
Templates
You can also use templates when adding rules. The template goes inside any property under the operations property for a rule. Templates can contain JavaScript-like syntax that have input variables automatically inserted for usage. See the alert rule schema for more information about the templates property.
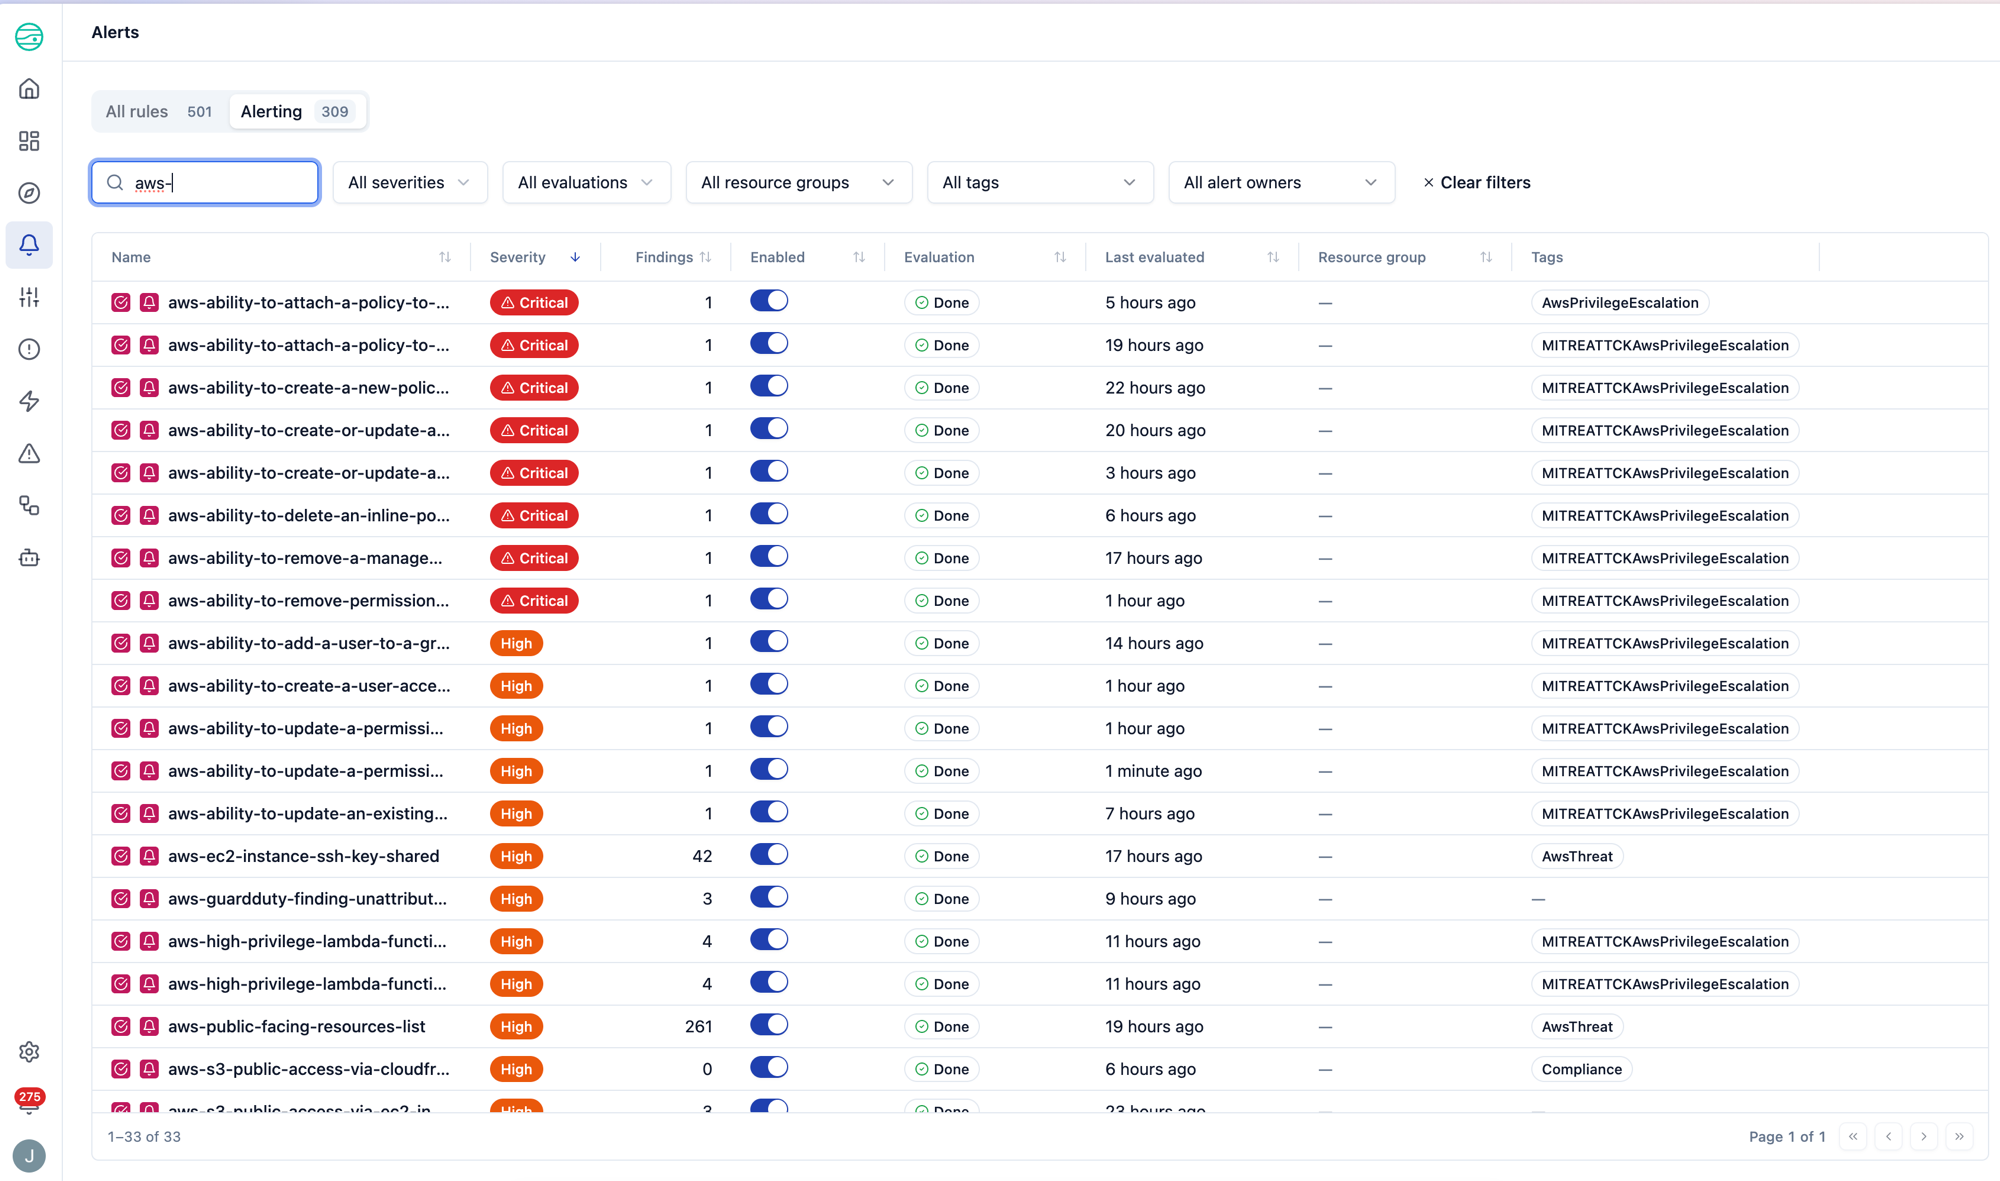
Managing alerts
The Alerting tab on the Rules page lists every rule that is currently firing. Selecting a rule opens its detail page, where you can review the query, its results over time, and the full evaluation history.
From a rule's row actions, you can also edit the rule associated with the alert and dismiss the alert. Dismissing an alert will stop it from showing until the next evaluation produces results.
Understanding the Findings column
The Findings column in the Rules table shows the number of results behind a rule's currently active alert — not a running total for the rule. The count comes from the active alert's most recent evaluation, so it is only populated while a rule is in the Alerting state.
A rule shows an em dash (—) in the Findings column when it has no active alert. This is expected in several cases:
- The rule has no JupiterOne Alert action. Findings live on an alert, and an alert is only created by a JupiterOne Alert action. A rule that only tags entities, creates a Jira ticket, or sends a webhook (with no alert action) will never show a findings count, even when it is doing work on every evaluation.
- The rule's trigger conditions weren't met, so no alert was created (for example, the query returned no results, or results haven't changed since the last evaluation).
- The alert was dismissed or resolved. Once an alert leaves the active state, its rule returns to an em dash.
In other words, the Findings column mirrors the Alerting tab: only rules that are actively firing display a count.
Rule row actions
Each row in the Rules table has an Enabled toggle and a set of action icons that appear when you hover over the row. The available actions depend on your role-based access control (RBAC) permissions; you'll see a tooltip explaining any action you don't have permission to use.

Available actions
- Copy link: Copies a direct link to the rule. Available to users with read access.
- Edit: Opens the rule editor. Available to users with update access.
- Evaluate now: Manually triggers a full rule evaluation, running all queries and actions outside the scheduled polling interval. Available to users with update access.
- Dismiss alert: Dismisses the active alert for a firing rule. Shown only on the Alerting tab. Available to users with update access.
- Delete: Permanently removes the rule from your workspace. This action cannot be undone. Available to users with delete access.
The Enabled toggle is a column on the table (not one of the hover action icons). It enables or disables the rule and requires update access. When a rule has failed to evaluate for an extended period, the system disables it automatically and its Evaluation column shows System disabled.
Evaluation history is no longer a row action. To review past runs, open the rule and use the Evaluation history tab (see below).
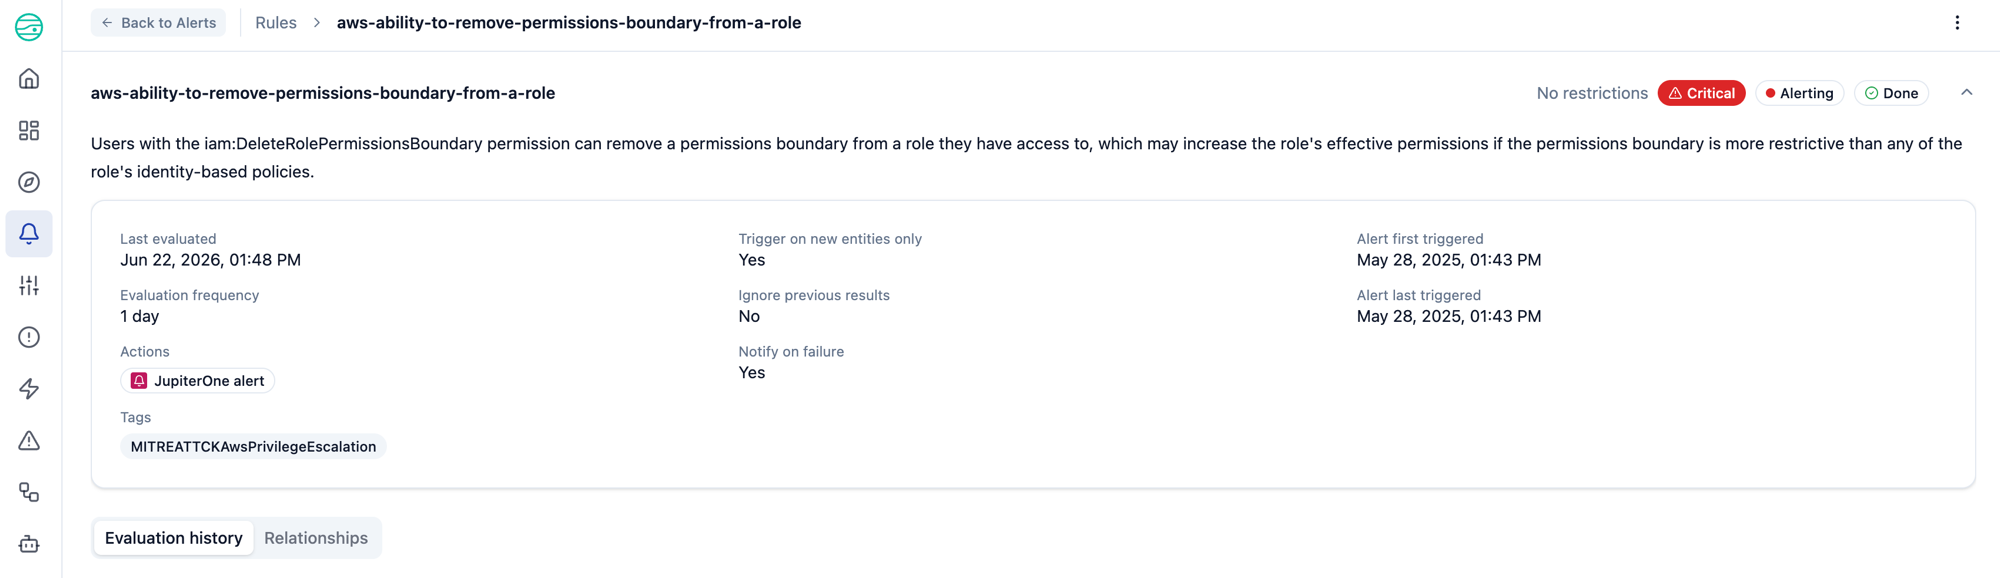
Rule Evaluation History
You can also view the history of rule evaluations whether they've created an alert or not. When you click into a rule from the Rules page, the rule's configuration appears in a collapsible panel at the top, with Evaluation history and Relationships tabs below it. The Evaluation history tab shows you the following information:
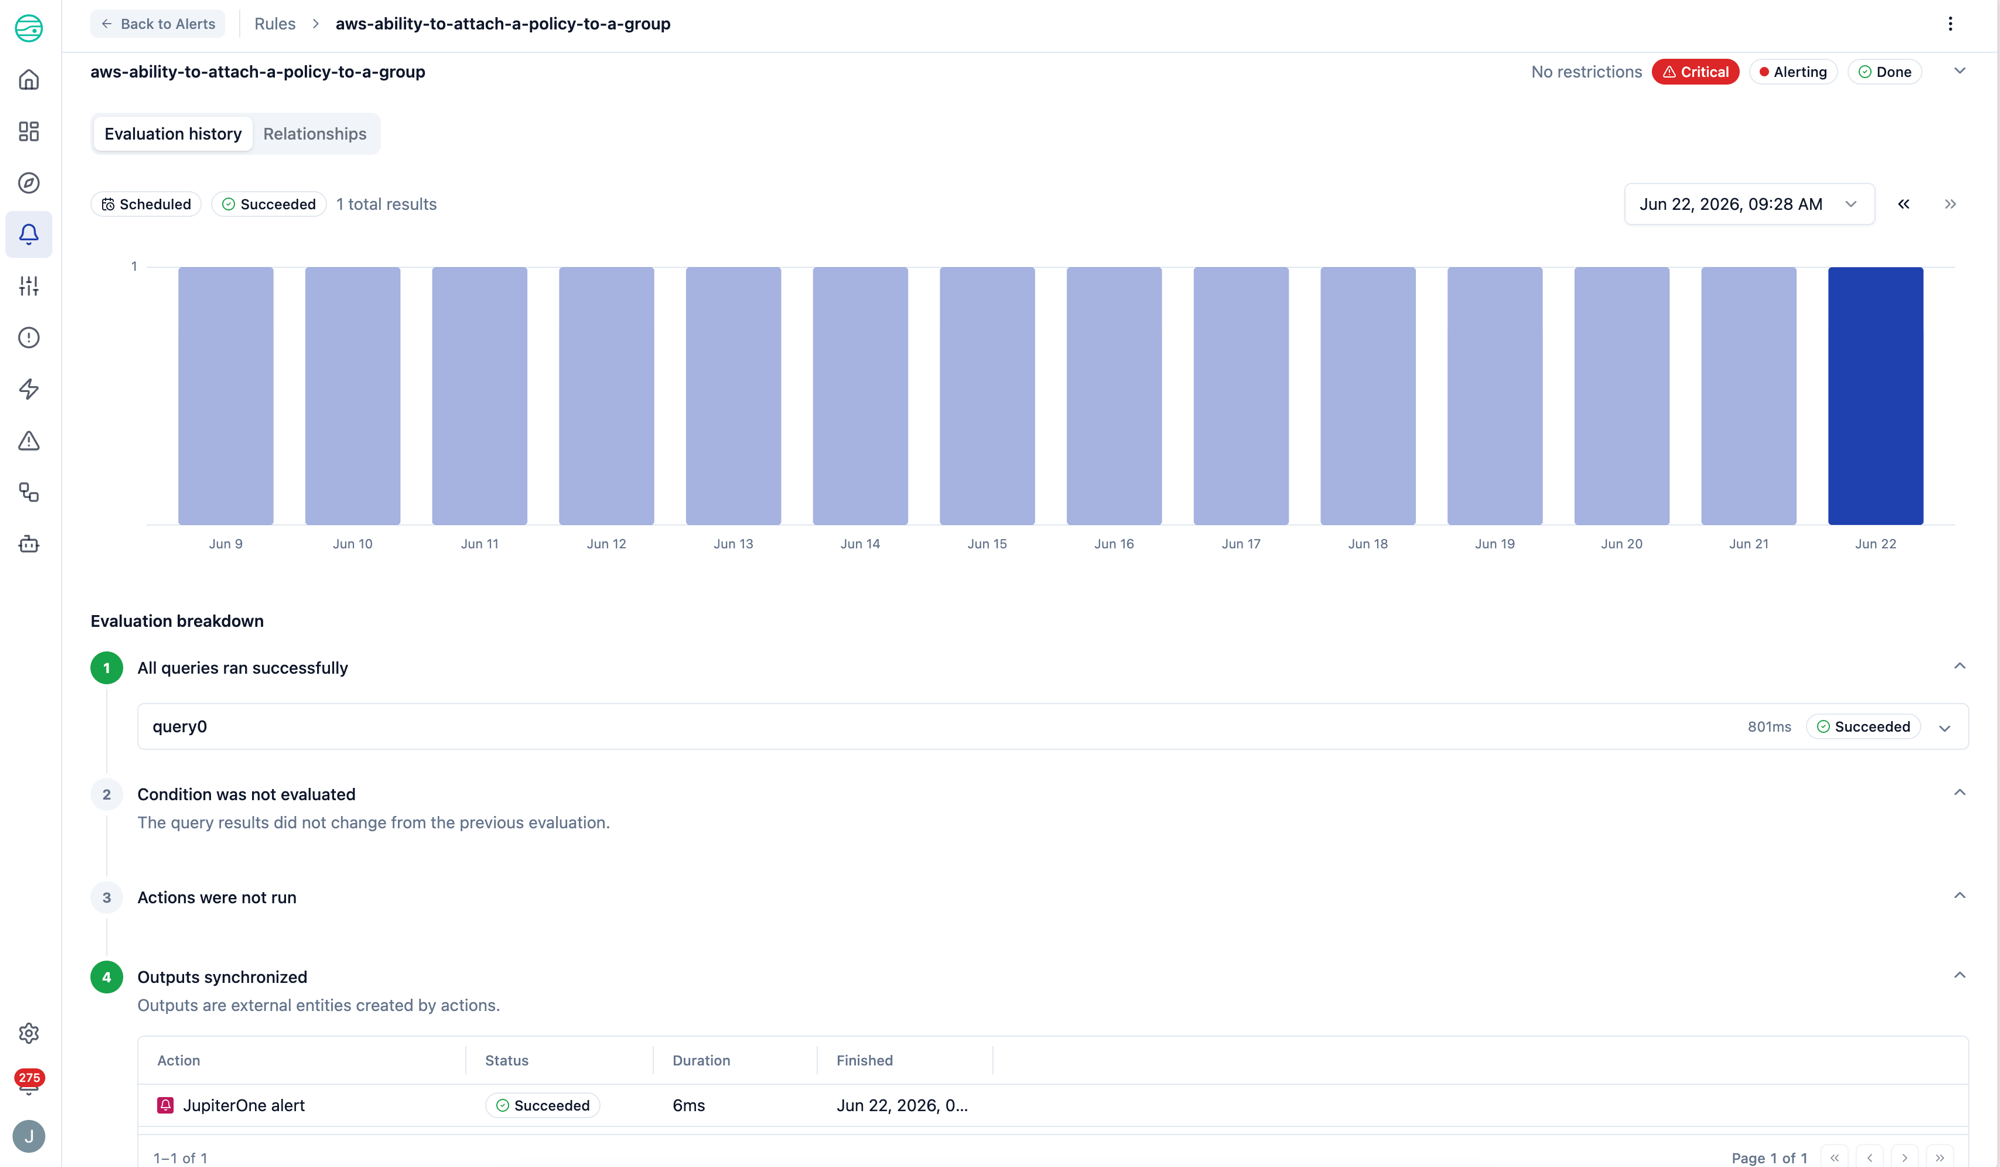
- The results of the query(ies) associated with the rule configuration, as well as the evaluation duration.
- If there were new entities found compared to the rule's last successful evaluation, you can toggle to view only the new entities. Note that if the query has changed between evaluation runs, the results may all be considered new.
- Whether the condition to proceed to running actions was met.
- The default condition on a rule is met when the number of the first query's results is greater than 0.
- The actions that were taken, if any, and the status of those actions.
- If there were action failures, there are logs to help troubleshoot the issue.