Data Out overview
Data Out is the JupiterOne surface that pushes events out of J1 and into the systems where your security and engineering teams already work. In the 1.0 release, Data Out powers automated and on-demand Jira ticket creation - including a one-click Create ticket action on every failing Continuous Control Monitoring (CCM) control test.
Data Out lives under Integrations in the J1 left navigation and is organized into two tabs.
What you can do with Data Out 1.0
- Authorize one or more Jira connections using an Atlassian API token
- Stand up named instances that route J1 events to a specific Jira project + issue type
- Send a real test ticket from the wizard to confirm the round-trip before you rely on the integration
- Click Create ticket on any failing CCM control test to file a Jira ticket with a prefilled title and description, then jump straight to the ticket via View in Jira
- Watch every outbound delivery on each instance's detail page and drill in on failures via the Error message column
In 1.0 the Workflow label you see in the Create ticket modal and the Instance label you see on the Instances tab refer to the same object. The two terms are used interchangeably across the product and these docs.
How Data Out is organized
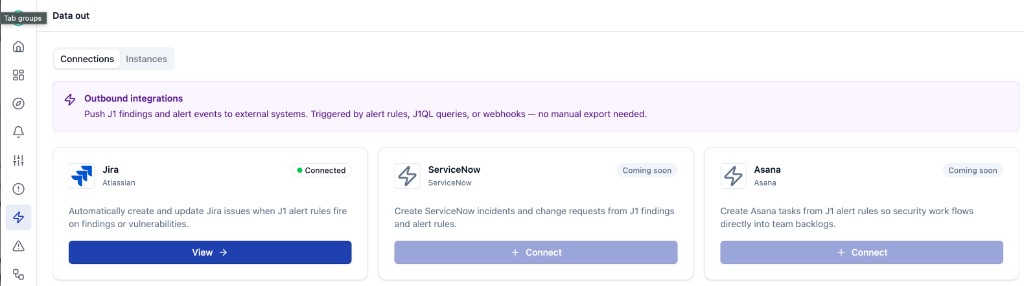
Data Out is laid out as two top-level tabs. The default landing tab is Connections.
| Tab | What it does |
|---|---|
| Connections | Catalog of outbound providers. Add or edit the credentials Data Out uses to authenticate to an external system. Jira is live in 1.0; ServiceNow and Asana are surfaced as Coming soon. |
| Instances | Lists every named instance (workflow) you have running, grouped by provider, with status, last-run time, success and failure counts, and project / issue-type metadata. Click any instance to open its detail page and see the per-instance Jobs table that lists every outbound delivery for that instance. |
Glossary
| Term | Meaning |
|---|---|
| Connection | A set of credentials that authorize JupiterOne to talk to an external system (for example, an Atlassian site + email + API token for a Jira workspace). One Jira workspace usually needs one Connection. |
| Instance (also called Workflow) | A named delivery target that combines a Connection with a target context. For Jira, the target context is a Data in Jira integration (which scopes you to a Jira project) and an Issue type. You can have many instances per connection. |
| Job | The record of a single outbound delivery for an instance - one row per outbound POST to the target system, including the resulting external ticket key on success or the error on failure. Jobs surface in the per-instance Jobs table on each instance's detail page. |
| Provider | The external system that Data Out talks to. 1.0 ships Jira as the live provider. ServiceNow and Asana are coming soon. |
Prerequisites
Before you can configure Data Out:
- You must be a full admin in the JupiterOne workspace. Connections and Instances are admin-only surfaces in 1.0
- You need an Atlassian account with permission to create issues in at least one Jira project on your target site
- You need to be able to mint an Atlassian API token for that account at id.atlassian.com
The Jira Data in integration is a separate, optional input. If you have it configured, the Instance wizard can scope an instance to a specific Jira project URL it has already discovered. You can still create instances without a Data in Jira integration. See Add an integration for setting up data ingestion.
Get started
The fastest path to your first ticket is the four-step quick start below. Follow them in order; each page picks up where the previous one left off.
- Configure a Jira connection - mint an Atlassian API token and authorize J1 to talk to your Jira site
- Create an instance - pick the connection, choose a Jira project + issue type, and (optionally) send a test payload
- Test your instance - send a real
[TEST]ticket and confirm it lands in Jira - Create a ticket from a failing CCM control test - the flagship 1.0 use case: turn any failing control into a tracked Jira ticket in three clicks
After you have a working instance, the reference pages cover ongoing operations:
- Manage instances - edit, stop, delete, and inspect instance details (including the per-instance Jobs table that records every outbound delivery)
- Troubleshooting - common failure modes and how to fix them