Test your instance
Sending a test payload through a new instance is the fastest way to confirm everything is wired correctly: the connection has the right token, the configured Jira project exists and accepts the issue type, and JupiterOne can write to it. We strongly recommend running a test on every instance before you let it serve real CCM tickets.
When to test
- Right after creating an instance - the Add Jira instance wizard ends on a Test step for exactly this reason
- After re-authorizing a connection - to confirm the new API token still has write access to the project
- After changing a Jira project's permissions or issue-type configuration - to catch breakage before a real CCM ticket fails
Test from the wizard
The cleanest test path is the Test step of the Add Jira instance wizard. It walks you through Summary and Description, posts a real ticket, and lets you confirm in Jira immediately.
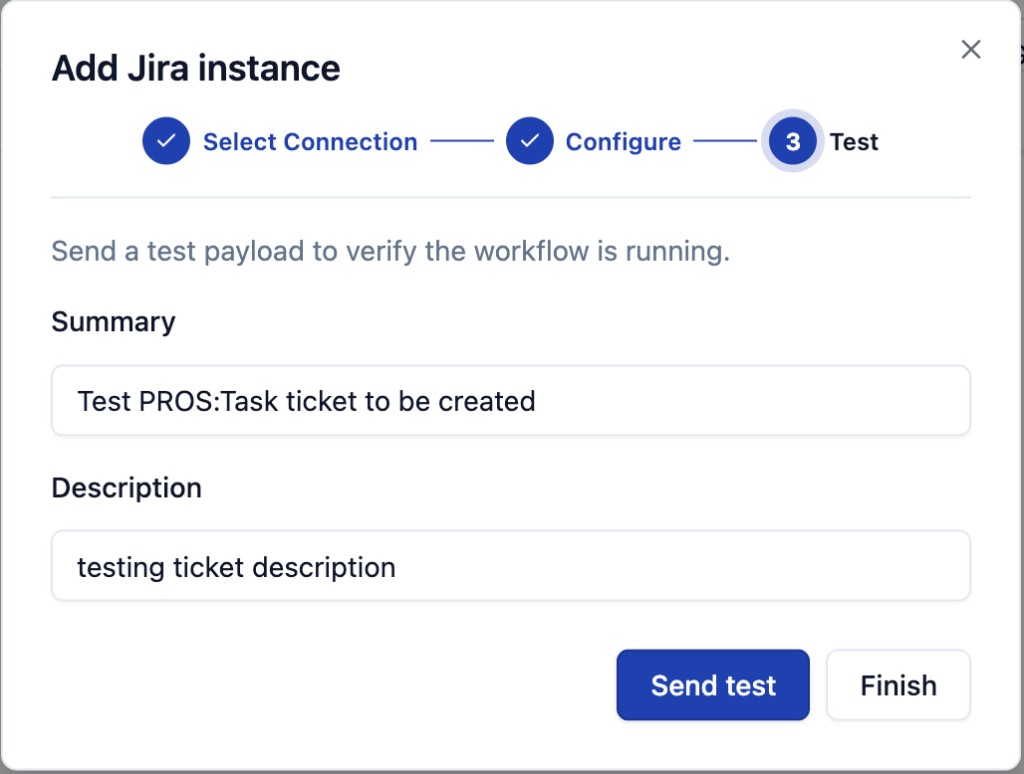
| Field | Default | What to do |
|---|---|---|
| Summary | Test PROS:Task ticket to be created (varies by configured issue type) | Edit to something distinctive so the ticket is easy to find in Jira, for example [J1 Data Out test - 2026-05-18]. |
| Description | testing ticket description | Optional. Add any context you want included in the test ticket body. |
Click Send test to fire the payload at the configured Jira project + issue type. After Send:
- A new ticket appears in Jira against the project the instance is scoped to, with the issue type the instance is configured for
- Open the ticket in Jira and confirm the Summary and Description landed as expected
- Delete the test ticket in Jira once you have verified - test tickets count toward project clutter and can confuse downstream automation
If you do not need to send a test (for example, you just verified an identical instance pointing at the same project), click Finish to close the wizard without sending.
What success looks like
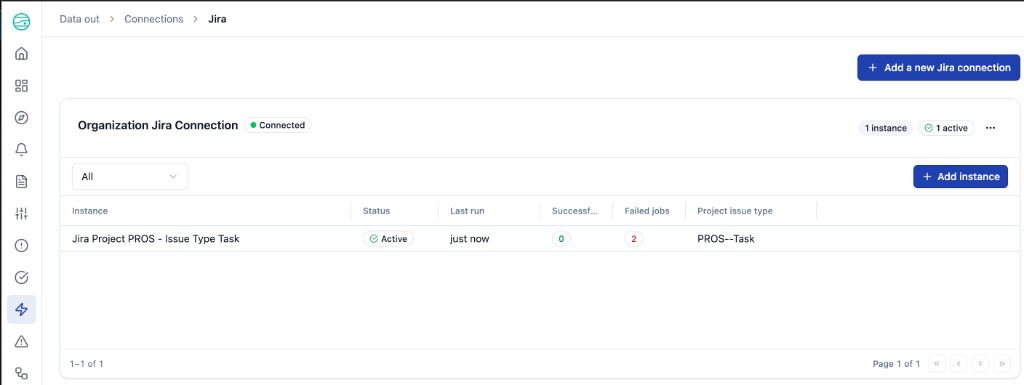
When the test succeeds, two surfaces update:
- The instance row's Successful count on the Instances tab (and on the connection card's instance table on the provider detail page) increments by 1
- The instance's Last run timestamp updates to "just now"
You can also open the instance detail page and find the test job at the top of the per-instance Jobs table with status Succeeded. See Manage instances.
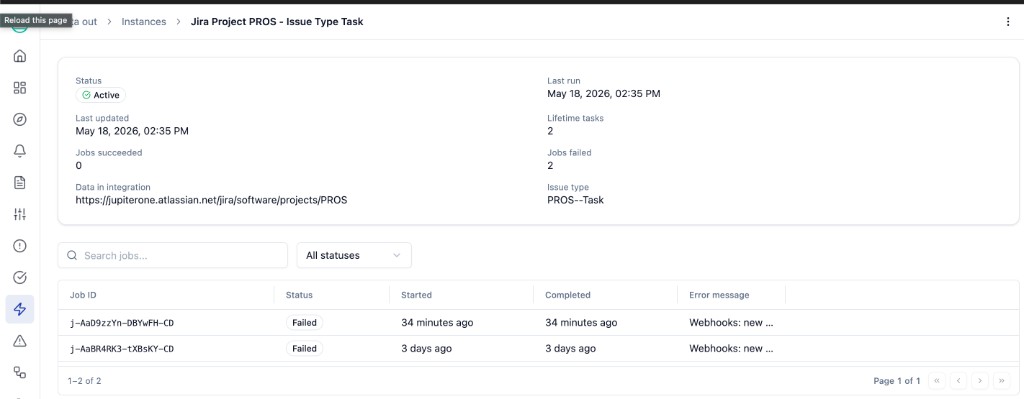
What failure looks like
If the test payload fails, the Failed jobs count on the instance row increments by 1 and the Last run timestamp shows the failure time. The instance Status remains Active - a single failed job does not deactivate the instance.
To see the error message:
-
Click the instance name to open the instance detail page
-
The most recent job appears at the top of the Jobs table with status Failed and an Error message column
-
Common causes:
- Authentication failure - the API token expired, was revoked, or the Atlassian account lost project access. Connection-level recovery is documented at Re-authorize a connection
- Issue type not present in the project - the configured issue type is not enabled in the target Jira project. Edit the instance and pick an issue type that is enabled for the project, or have your Jira admin enable the issue type in the project's issue scheme
- Project archived or moved - the Jira project was archived in Atlassian or its key changed. Update the Data in Jira integration field to point at the new project
- Required custom field missing - the project requires a custom field that the test payload does not provide. In 1.0, the test payload is fixed to Summary + Description; if the project requires more, file a normal ticket through the CCM Create ticket flow where you can fill the description with the missing context
For a fuller list of failure modes, see Troubleshooting.
Re-running a test on an existing instance
In 1.0, the wizard's Test step is the only test surface. To re-test an existing instance:
- Open Data out > Instances (or the provider detail page)
- Find the instance row, hover, and click the Edit (pencil) icon
- The Edit workflow modal opens. Change nothing if you just want to re-test, or update fields as needed
- Save - the next CCM Create ticket call (or webhook event) is the next live exercise of the instance. Watch the Successful and Failed jobs counts on the row, or open the instance detail page to see the per-job result
A Send-test button on the existing-instance edit modal is on the roadmap; for now, the wizard's Test step is the simplest dedicated way to send a synthetic payload.