Data Out 1.0 Release Notes
Release date: May 19, 2026
Data Out 1.0 launches a first-class outbound integration surface in JupiterOne. Workspace admins can authorize a Jira connection in three guided steps, stand up named workflow instances that route J1 events to a specific project + issue type, and watch every outbound delivery in a unified Jobs log. CCM users can turn any failing control into a tracked Jira ticket with a single click - and the resulting ticket is linked back from the control detail panel so closing the loop is one tap away.
What is new in Data Out 1.0
| Feature | What it means for you |
|---|---|
| Top-level Data Out surface | Two new tabs - Connections and Instances - under the Integrations module, with a clean separation between getting data into J1 and getting it out |
| Jira provider (live) | Authenticate Jira workspaces via Atlassian API token, see "coming soon" placeholders for ServiceNow and Asana |
| Guided Connection wizard | Two steps to authorize a Jira workspace (Connect + Verify) plus an optional Configure + Test pass to spin up the first instance in the same flow |
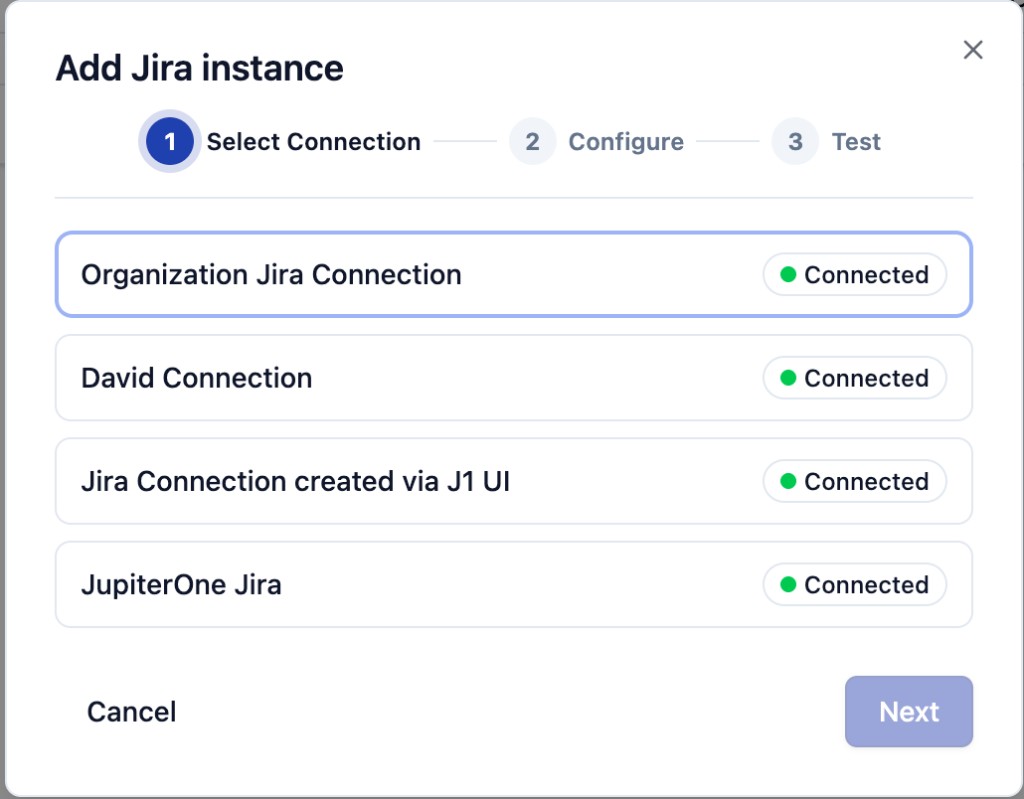
| Add Jira instance wizard | A 3-step Stepper modal (Select Connection -> Configure -> Test) that creates a named instance scoped to a Jira project + issue type, with an optional in-wizard test ticket |
| Instance lifecycle controls | Edit, Stop, and Delete instances from a single hover row; per-instance detail page with summary metrics and a focused jobs table |
| Per-instance Jobs table | Every outbound delivery for an instance is recorded on its detail page, with status, timestamps, and per-job error messages for triage |
| CCM Create ticket | A prominent Create ticket action on every failing CCM control test, opening a 4-field modal (Workflow / Title / Description / Assignee) and dropping a ready-to-go ticket into Jira |
| Linked Jira issues + View in Jira | Tickets created from CCM appear inline on the originating control detail panel, with a one-click View in Jira link |
| Full-admin gate | Connection and instance configuration is locked to full admins so credentials and routing stay under tight control |
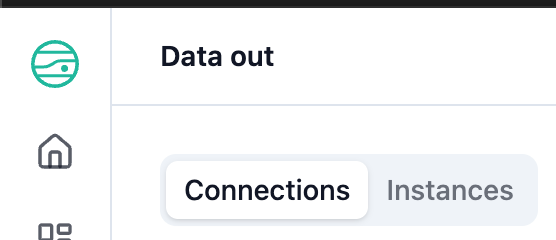
Top-level Data Out surface
Data Out is now its own destination in the J1 left navigation under Integrations. Two tabs split the responsibility cleanly: Connections is for credentials, and Instances is for routing - with execution history surfaced on each instance's detail page.
The Connections tab presents the provider catalog. Jira ships live with a green Connected badge once you finish the wizard; ServiceNow and Asana are surfaced as Coming soon placeholders so customers know they are coming without us blocking the rollout on them.
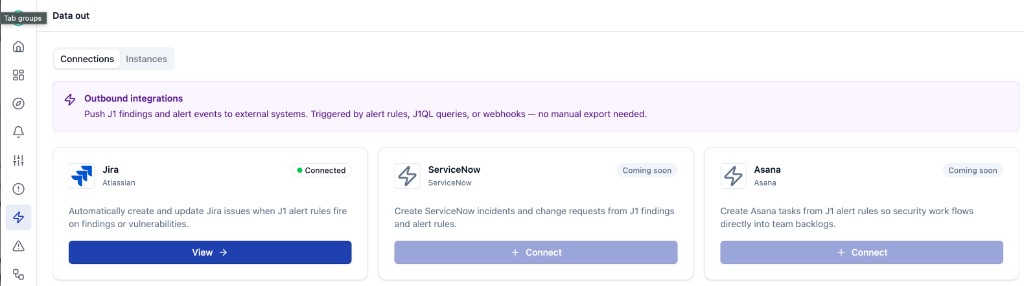
Use the Connections tab as the single source of truth for "is this credential still good?" - the Authorization status badge on each connection card flips to Needs reauthorization the moment a token expires.
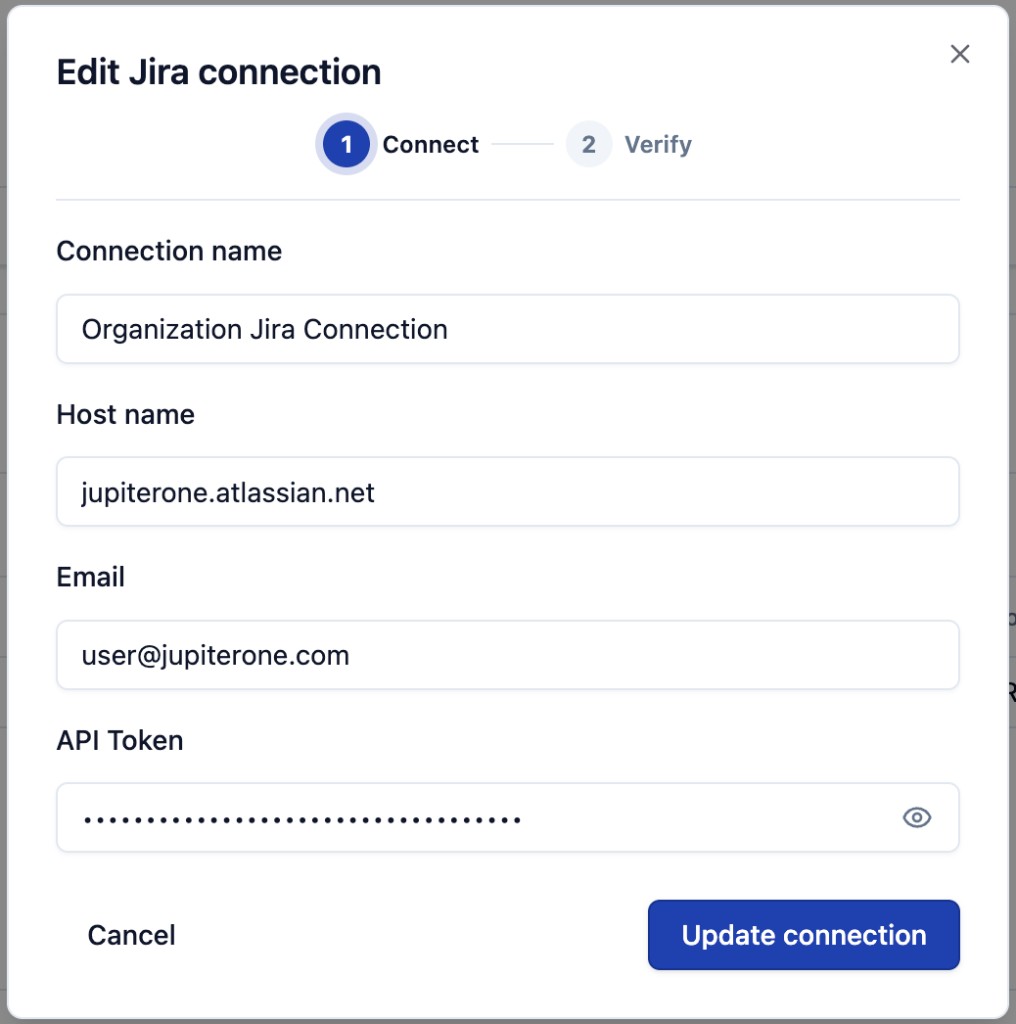
Guided Jira connection wizard
Authorizing Jira is now a two-step Stepper experience. The Connect step captures the Atlassian site, account email, and API token; the Verify step proves the credentials work by listing the Jira projects we can read with them.
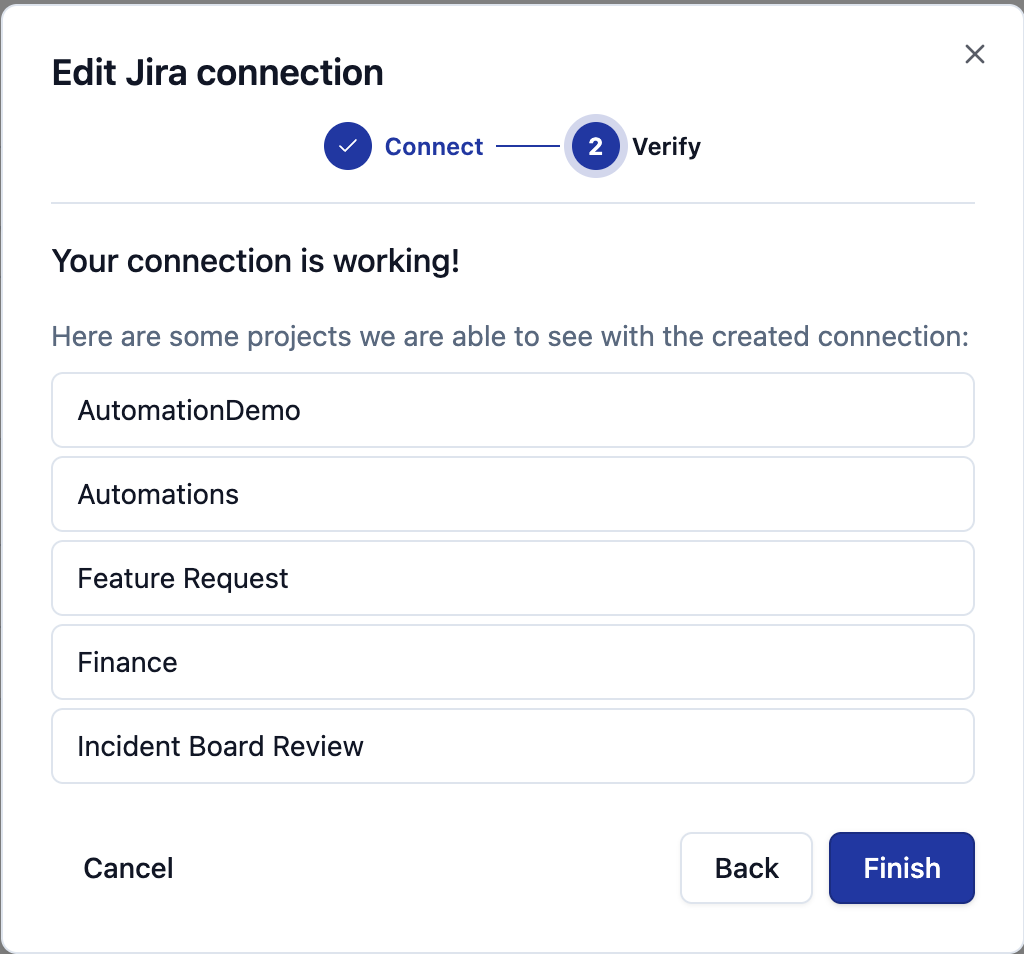
In the new-connection flow, the wizard continues directly into the Add Jira instance Configure + Test steps, so an admin finishes with a working connection and a first running workflow in a single pass. See the Configure a Jira connection guide for the end-to-end walkthrough.
Add Jira instance wizard
Standing up an instance is a 3-step Stepper modal: pick a connection, configure the workflow, and (optionally) send a test ticket through it.
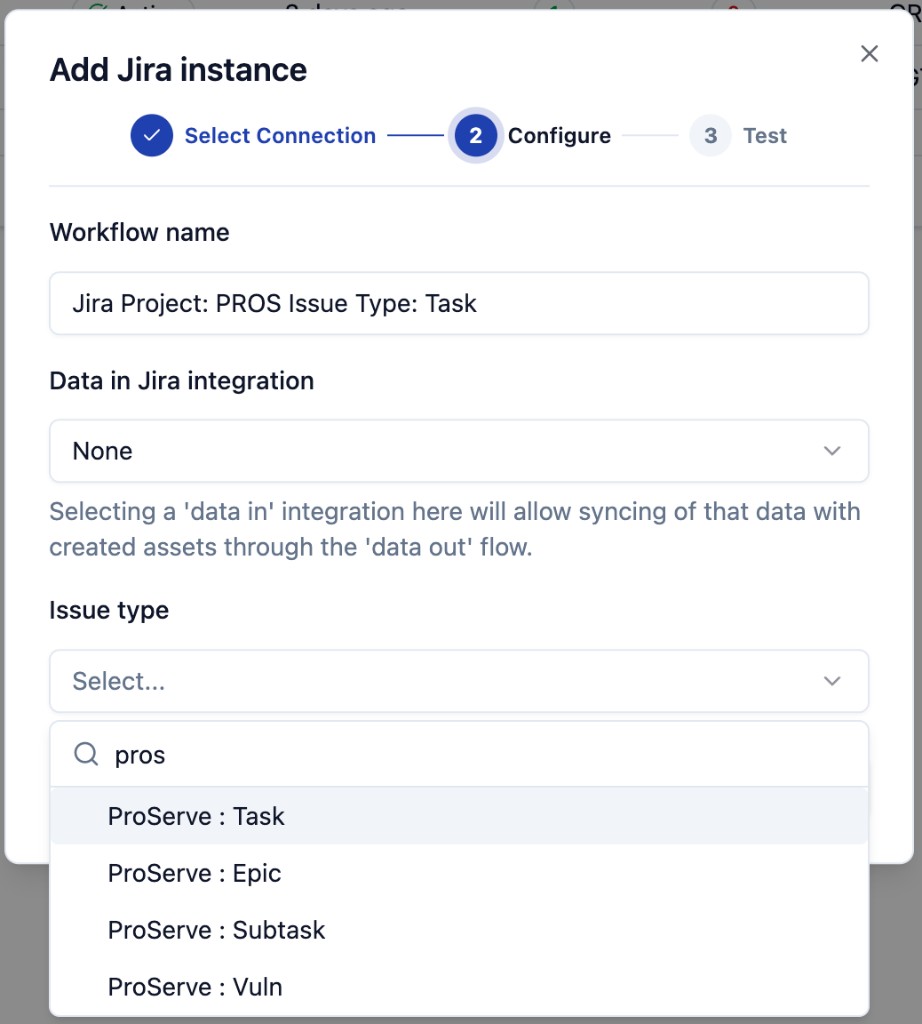
The Configure step is where you tell Data Out which Jira project and issue type the instance writes to. The Data in Jira integration field links the instance to a project J1 already ingests, so the Issue type dropdown is populated from the project's real metadata.
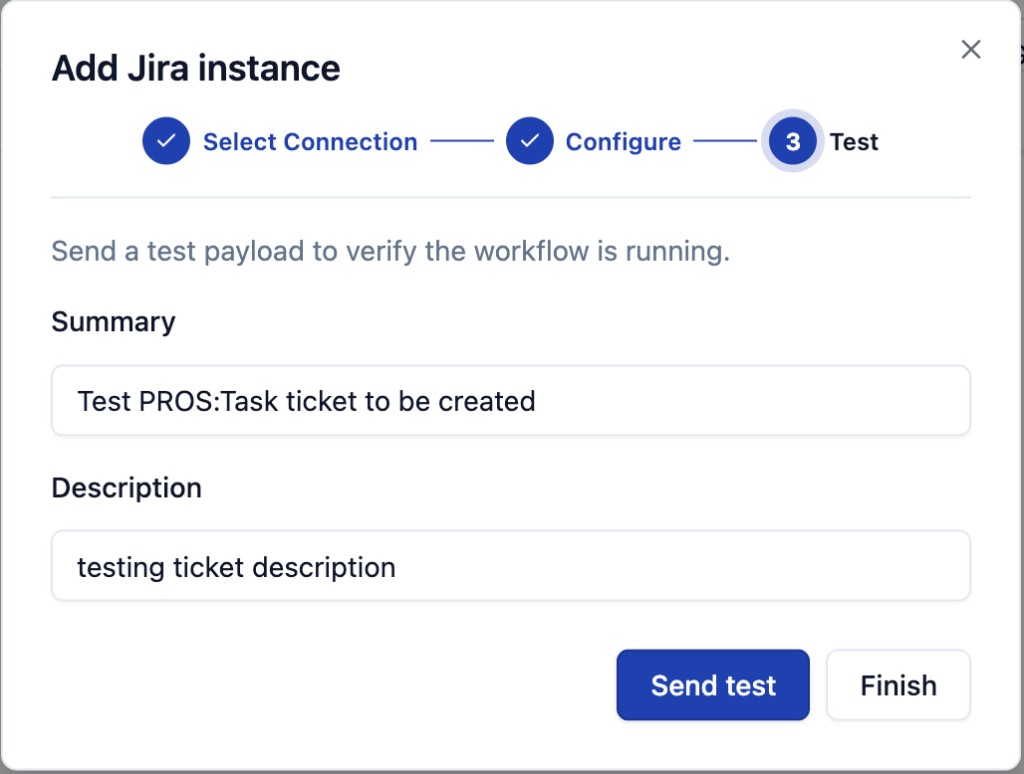
The Test step lets you confirm the round-trip before you trust the instance with real CCM tickets. It posts a real Jira ticket with a Summary and Description you can edit.
See the Create an instance guide for the full walkthrough.
Instance lifecycle and the Instances tab
The Instances tab groups every running instance by provider with N instances / N active badges per group. Hovering a row reveals Stop, Edit, and Delete actions on the right edge.
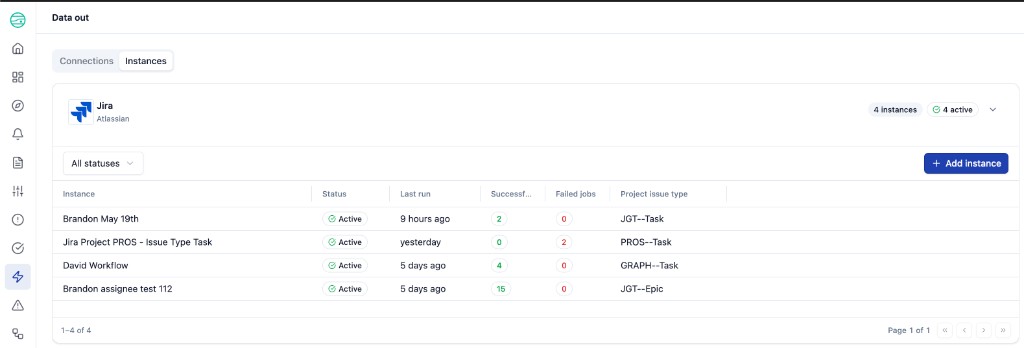
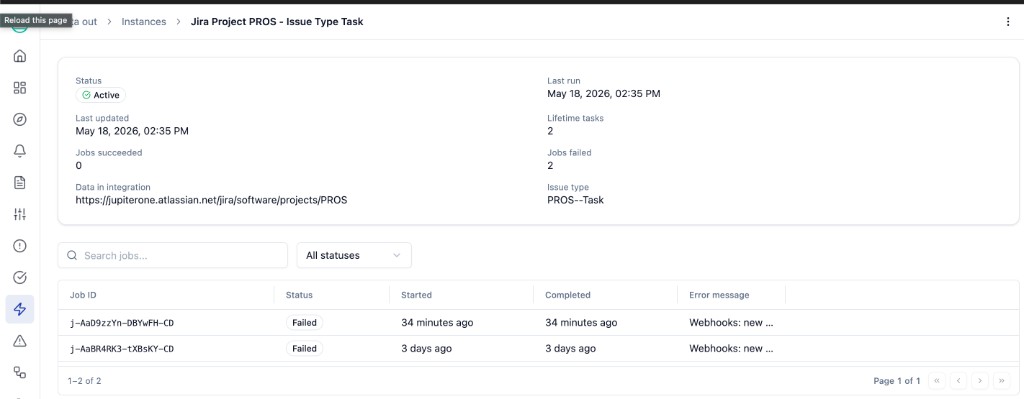
Clicking an instance opens a per-instance detail page with eight headline metrics (Status / Last run / Last updated / Lifetime tasks / Jobs succeeded / Jobs failed / Data in integration / Issue type) plus a focused per-instance Jobs table.
See the Manage instances guide for the full reference.
CCM Create ticket
The flagship producer experience in 1.0 is the Create ticket action on every failing CCM control test. From the control detail panel, click Create ticket to open a 4-field modal: pick a Workflow, edit the prefilled Title and Description, optionally assign a teammate, and click Create.
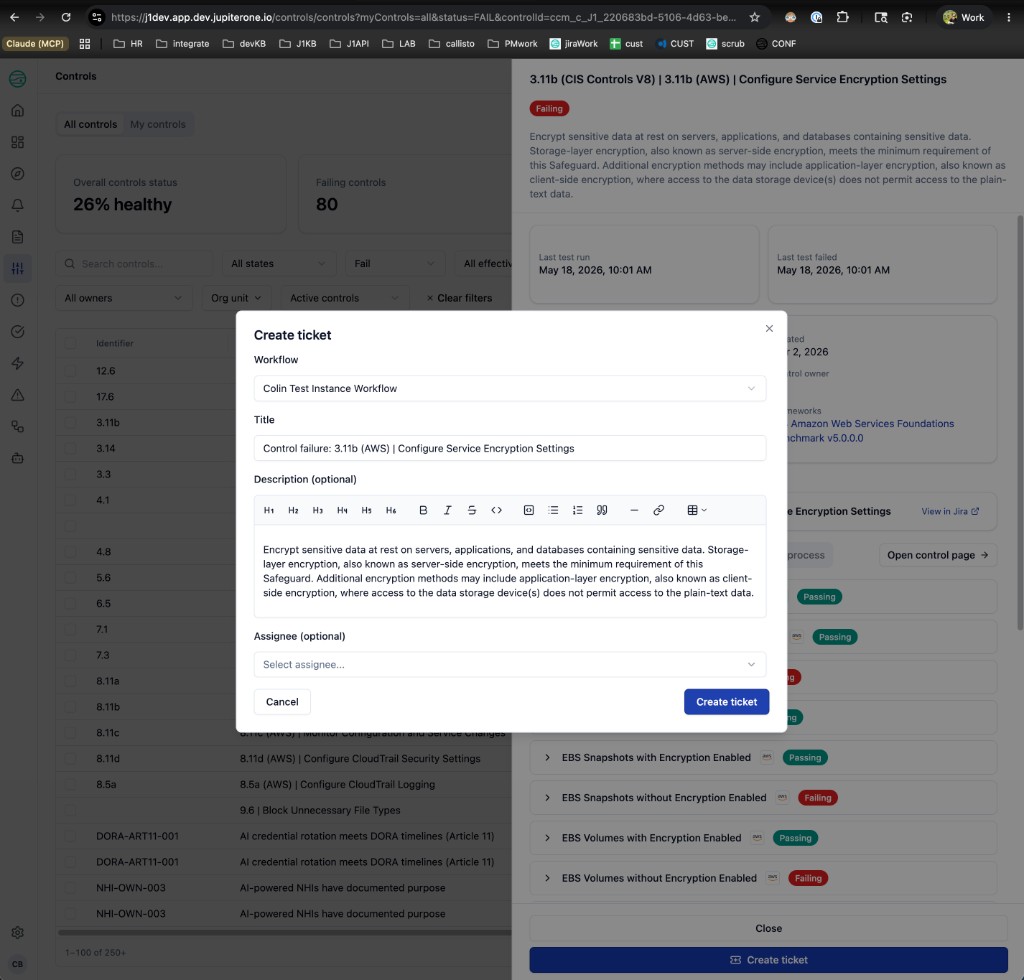
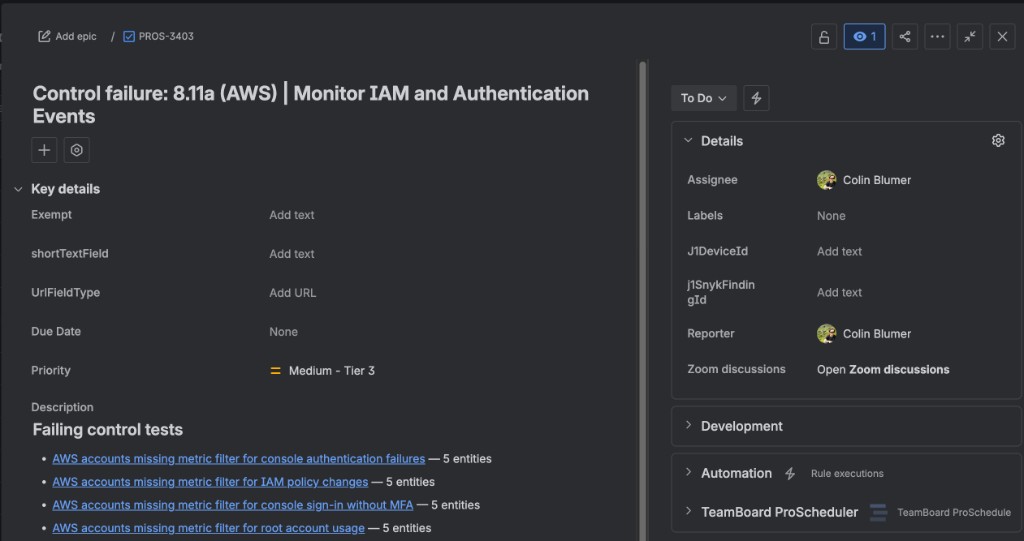
The Description editor renders rich markdown (headings, lists, links, tables) and converts cleanly to Jira wiki markup on submit, so the resulting Jira ticket reads naturally:
In 1.0 the modal exposes only the four fields above. Project, issue type, priority, labels, and other Jira-side configuration are determined by the selected Workflow - so admins can pre-bake routing decisions and let CCM users focus on the message they want to land.
After Create ticket succeeds, the originating control detail panel surfaces a Linked Jira issues section listing every ticket created from that control, each with a View in Jira external link.
See the Create a Jira ticket from a failing CCM control test guide for the full round-trip.
Per-instance Jobs table
Every outbound delivery for an instance is recorded on the instance's detail page (Data out > Instances > {Workflow name}) with Job ID, Status, Started, Completed, and Error message columns. The same page surfaces lifetime success and failure counts so admins can spot a degraded instance at a glance.
See the Manage instances - Per-instance Jobs table guide for the full reference.
Permissions
Data Out 1.0 is admin-first by design:
- Connections and Instances tabs require the full admin role
- The Create ticket modal in CCM is available to any user who can open the control detail panel - but if no Active workflow exists, non-admins see "Ask an admin to set up a data-out ticketing workflow."
- View in Jira links inherit the user's existing Jira project permissions in Atlassian
Getting started
If you are a workspace admin setting up Data Out for the first time:
- Read the Data Out overview to orient yourself
- Mint an API token and follow Configure a Jira connection
- Continue into Create an instance and send a test ticket
- Tell your CCM users they can now click Create ticket on failing controls - link them to the Create a ticket from CCM walkthrough